
If you have ever dreamed of creating your own sweet indulgence right at home, this Homemade Chocolate Bars Recipe is exactly what you need. Rich, creamy, and so customizable, these chocolate bars blend simple ingredients into a luxurious treat that melts in your mouth. From the silky melted cocoa butter to the deep flavor of cocoa powder, each bite is a celebration of pure chocolate bliss that you crafted yourself. Whether you enjoy them as a snack or gift them to loved ones, these bars elevate homemade chocolate to an art form you’ll be proud to share.
Ingredients You’ll Need
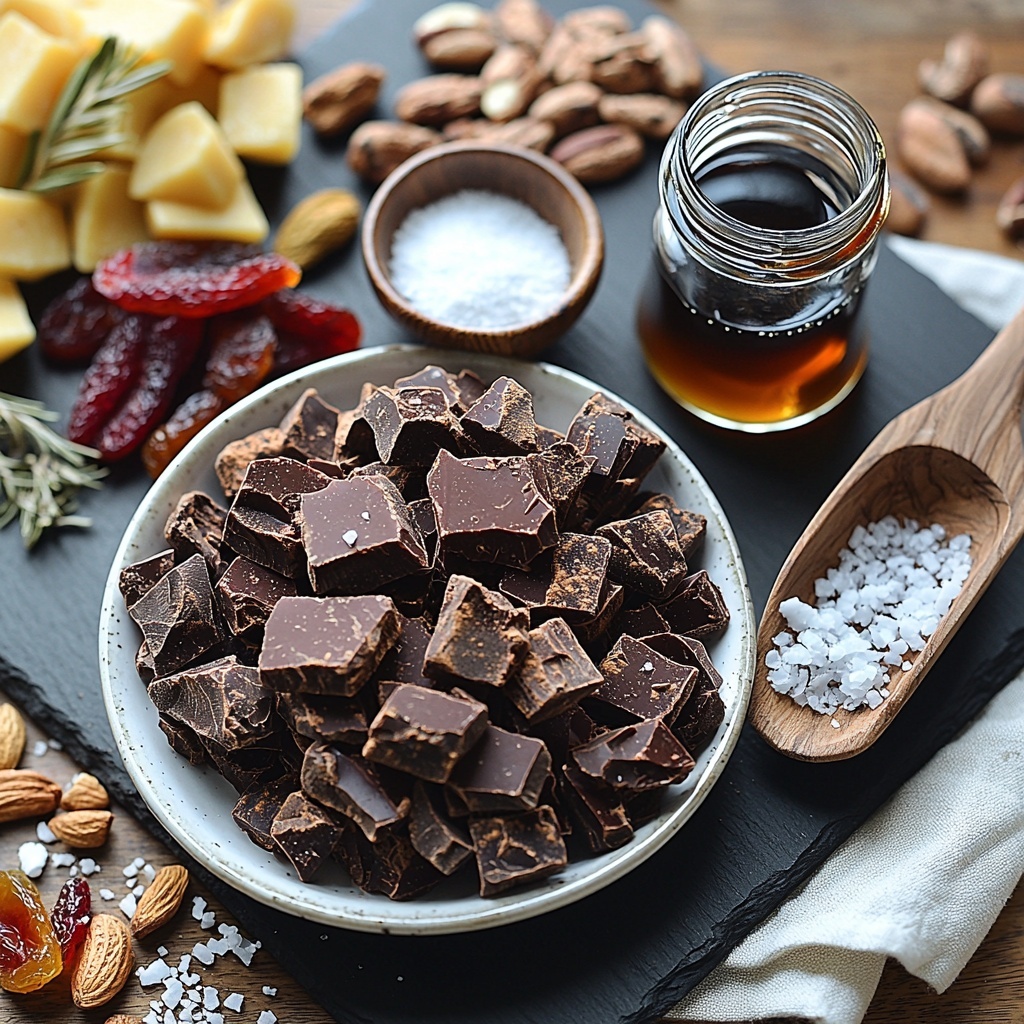
Making these homemade chocolate bars is delightfully simple, with a handful of essential ingredients that each play a crucial role in the final flavor and texture. These staples ensure your bars are smooth, rich, and perfectly set, while optional add-ins let you customize your treat to your exact preference.
- 1 cup cocoa butter, chopped: This natural fat gives the bars their creamy, melt-in-your-mouth texture and shiny finish.
- 3/4 cup unsweetened cocoa powder: For that intense chocolate flavor, you can swap it with cacao powder if you prefer raw chocolate.
- 1/4 cup powdered sugar or maple syrup: Adds the perfect touch of sweetness while allowing you to control the flavor profile.
- 1/2 teaspoon vanilla extract: Enhances the chocolate with warm, aromatic notes making each bite more complex.
- Pinch of salt: Balances the sweetness and deepens the overall taste.
- Optional add-ins (chopped nuts, dried fruit, shredded coconut, or sea salt): Personalize your bars with delightful textures and flavors.
How to Make Homemade Chocolate Bars Recipe
Step 1: Melt the Cocoa Butter
Begin by melting the cocoa butter gently using a double boiler or a heatproof bowl set over simmering water. Stir continuously until the butter becomes completely smooth and liquid. This careful melting process preserves the rich flavors and ensures the chocolate bar has that perfect silky mouthfeel.
Step 2: Whisk in Remaining Ingredients
Once melted, take the bowl off the heat and whisk in the cocoa powder, powdered sugar or maple syrup, vanilla extract, and a pinch of salt. Mix until everything is fully combined and smooth. This step is where your bar gets its rich, chocolatey depth and balanced sweetness, so take your time to blend it thoroughly.
Step 3: Pour into Molds
Pour the luscious chocolate mixture into silicone chocolate bar molds or a parchment-lined baking dish if you prefer. Using silicone molds makes it easy to pop out perfectly shaped bars later, but a dish works just as well if you want to slice your pieces more freely.
Step 4: Add Your Favorite Toppings
This is the fun part! Sprinkle your chosen add-ins like chopped nuts, dried fruit, shredded coconut, or a dash of sea salt on top of the chocolate. Gently press them into the surface so they stick as the bars set, giving every bite exciting texture and flavor bursts.
Step 5: Chill Until Set
Place your molds or dish in the refrigerator and let the chocolate bars chill for 1-2 hours. This cooling time allows the chocolate to harden to that satisfyingly firm texture you want from a homemade chocolate bar, making it easy to enjoy and share.
Step 6: Unmold and Serve
Once fully set, pop the bars out of their molds or slice your baked dish into bars. You’ll immediately notice the gorgeous glossy surface and the aroma that only a homemade chocolate bar can have – trust me, it’s addictive!
Step 7: Store Properly
Keep your delicious creations in an airtight container either at room temperature or in the fridge if you prefer a firmer texture. This careful storage preserves the fresh flavor and smooth consistency.
How to Serve Homemade Chocolate Bars Recipe
Garnishes
Finish your homemade chocolate bars with an extra flourish by sprinkling coarse sea salt, edible gold flakes, or a drizzle of melted white chocolate right before serving. These touches add visual appeal and subtle flavor contrasts that make your bars feel truly special.
Side Dishes
Serve your chocolate bars alongside fresh berries, a scoop of creamy vanilla ice cream, or even a hot cup of coffee or tea. These complementary flavors and temperatures create an irresistible dessert experience that will impress guests or satisfy your own sweet tooth beautifully.
Creative Ways to Present
Get creative by wrapping individual bars in wax paper tied with twine or placing them in decorative boxes if you’re gifting. You can also break them into rustic chunks and use them as decadent toppings on yogurt or oatmeal. The possibilities are endless with this Homemade Chocolate Bars Recipe as your delicious base!
Make Ahead and Storage
Storing Leftovers
Store your homemade chocolate bars in an airtight container at room temperature or refrigerated if you like a firmer bite. They will stay fresh and delicious for 3-4 days, making them an excellent treat to prepare ahead for snack time or special occasions.
Freezing
If you want to keep your bars longer, you can freeze them in an airtight container for up to 1 month. Just be sure to thaw them in the fridge before serving to maintain that perfect texture and sheen.
Reheating
There’s no need to reheat these bars, but if you want a softer texture, let them sit at room temperature for 10-15 minutes. Avoid direct heat as it can cause the chocolate to seize or become grainy.
FAQs
Can I use other sweeteners instead of powdered sugar?
Absolutely! You can swap powdered sugar for maple syrup to keep the bar naturally sweetened. Just remember that maple syrup will add moisture, so you may need to adjust chilling time to ensure your bars fully set.
What if I don’t have cocoa butter?
Cocoa butter is the key to that authentic chocolate texture, but coconut oil can be used as a substitute; however, the bars may be softer and have a slightly different flavor. For the best results, stick to cocoa butter when you can.
Can I add flavors like chili or coffee?
Definitely! Adding a pinch of chili powder or instant coffee powder to the mix can create exciting flavor twists. Just start with small amounts to complement rather than overpower your chocolate.
Why do I need to use a double boiler?
The double boiler ensures gentle, even melting of the cocoa butter without burning it. Direct heat can scorch the chocolate, ruining its smooth texture and delicate flavor.
How long do the homemade chocolate bars last?
Stored properly in an airtight container, your bars will remain fresh and tasty for 3-4 days at room temperature or refrigerated. For longer storage, freezing up to 1 month works well.
Final Thoughts
Making your own chocolate bars at home is such a rewarding experience, especially when the end result tastes this amazing. This Homemade Chocolate Bars Recipe is simple, versatile, and a wonderful way to indulge yourself while knowing exactly what goes into every bite. So why not give it a try? Your kitchen, and your taste buds, will thank you!
Print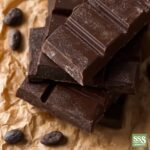
Homemade Chocolate Bars Recipe
- Prep Time: 10 minutes
- Cook Time: 5 minutes (melting and mixing)
- Total Time: 1 hour 10 minutes (including chilling time)
- Yield: 10 servings
- Category: Dessert
- Method: No-Cook
- Cuisine: International
- Diet: Vegetarian
Description
This Homemade Chocolate Bars recipe is a simple, no-bake treat that allows you to create rich, smooth chocolate using natural ingredients like cocoa butter and cocoa powder. Customize your bars with nuts, dried fruits, or coconut for added texture and flavor. Perfect for those wanting a wholesome chocolate fix without preservatives or artificial additives.
Ingredients
Base Ingredients
- 1 cup cocoa butter, chopped
- 3/4 cup unsweetened cocoa powder (or cacao powder for raw chocolate)
- 1/4 cup powdered sugar or maple syrup (for sweetness)
- 1/2 teaspoon vanilla extract
- Pinch of salt
Optional Add-ins
- Chopped nuts
- Dried fruit
- Shredded coconut
- Sea salt
Instructions
- Melt Cocoa Butter: In a double boiler or a heatproof bowl set over a saucepan of simmering water, melt the chopped cocoa butter, stirring constantly until it becomes smooth and fully melted.
- Combine Ingredients: Remove the melted cocoa butter from heat and whisk in the unsweetened cocoa powder, powdered sugar or maple syrup, vanilla extract, and a pinch of salt until the mixture is fully combined and smooth.
- Prepare Mold: Pour the chocolate mixture into silicone chocolate bar molds or a parchment-lined baking dish to shape your bars.
- Add Toppings: Sprinkle any desired add-ins like chopped nuts, dried fruit, shredded coconut, or a dash of sea salt on top of the chocolate, gently pressing them into the surface to adhere.
- Set Chocolate: Place the filled molds or baking dish in the refrigerator and chill for 1 to 2 hours, or until the chocolate is completely set and firm.
- Unmold and Slice: Once the chocolate has set, pop the bars out of the silicone molds or slice the solid chocolate into bars if using a baking dish.
- Store Properly: Store your homemade chocolate bars in an airtight container at room temperature for a soft texture, or in the refrigerator for a firmer bite.
Notes
- Use maple syrup instead of powdered sugar for a vegan-friendly sweetener and a softer texture.
- Ensure the chocolate is completely set before unmolding to prevent breakage.
- Customize with your favorite add-ins for unique flavor combinations.
- Store chocolate away from heat and moisture to maintain freshness.

