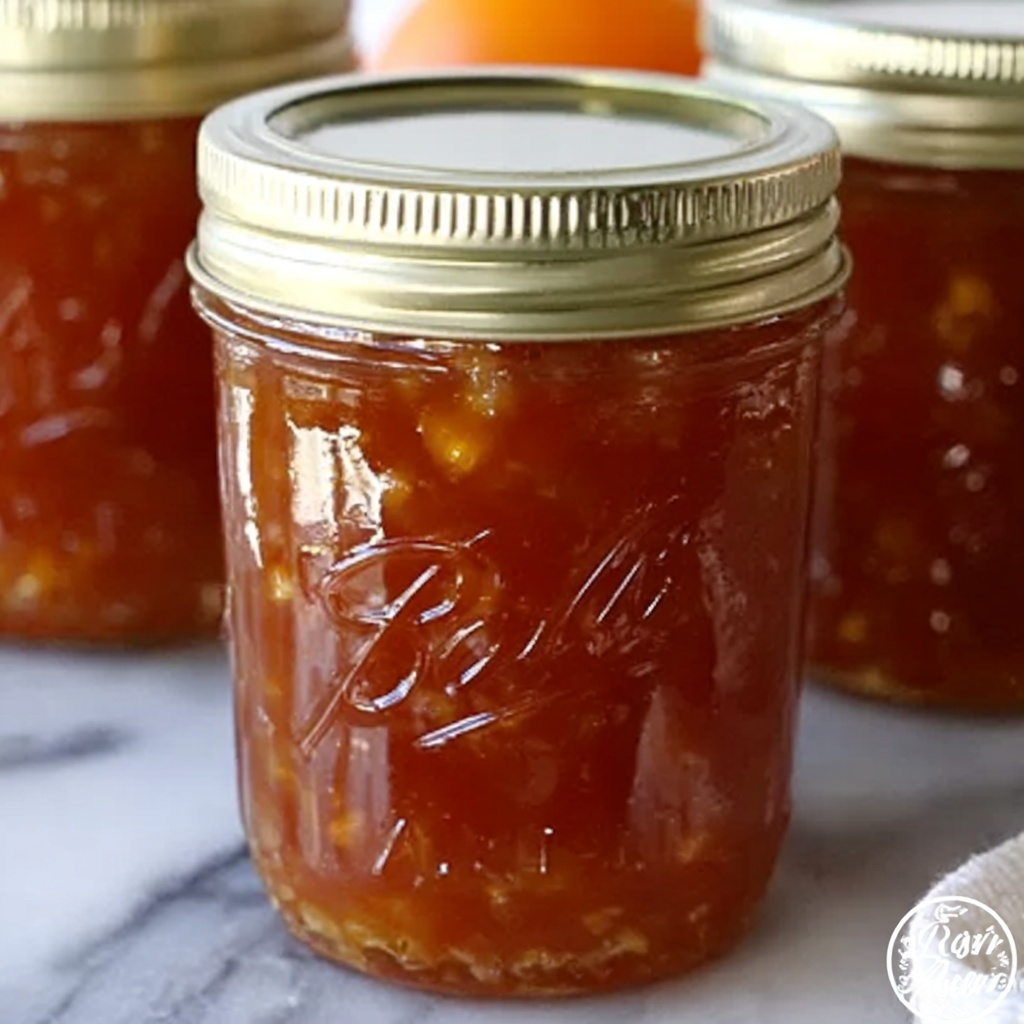
Nothing feels quite as comforting as a homemade batch of apple butter, simmered to perfection and bursting with warm spices that whisper fall with every spoonful. This Canning Apple Butter Recipe captures all that cozy goodness in a jar, turning simple apples and pantry staples into a luscious spread you’ll want to keep on hand year-round. Whether you’re savoring it on a morning toast or gifting it to loved ones, this apple butter will quickly become one of your cherished kitchen staples.
Ingredients You’ll Need
The beauty of this Canning Apple Butter Recipe lies in its straightforward ingredient list—each one playing a vital role in shaping the rich, spiced flavor and velvety texture of the final spread. These familiar ingredients come together to create the perfect balance of sweetness, warmth, and apple essence.
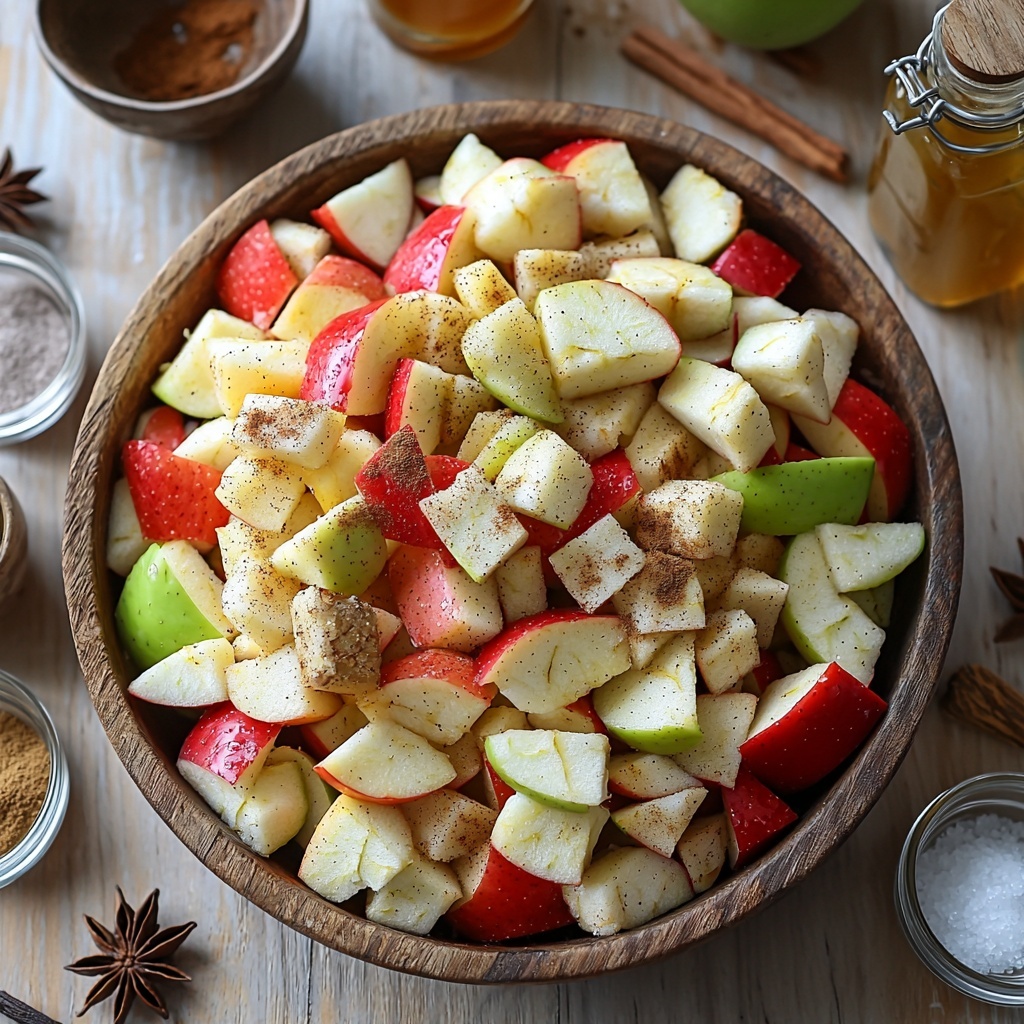
- 6 lbs apples (Fuji, Gala, or Honeycrisp): The foundation of apple butter, these varieties offer a naturally sweet and crisp flavor perfect for cooking down.
- 2 cups granulated sugar: Adds sweetness and helps with preservation, giving the apple butter that classic, smooth finish.
- 1 cup brown sugar, packed: Brings in a deep, caramel-like richness that complements the spices beautifully.
- 1 tablespoon ground cinnamon: A spiced staple that infuses warmth and depth.
- ½ teaspoon ground nutmeg: Adds a subtle nutty, slightly sweet aroma that’s essential for that cozy fall feeling.
- ½ teaspoon ground cloves: A bold spice that elevates the apple butter with a hint of pungent warmth.
- ¼ teaspoon salt: Enhances all the flavors and balances the sweetness.
- 1 tablespoon vanilla extract: Adds a smooth, fragrant note to round out the flavor profile.
- ½ cup apple cider (optional for flavor depth): Introduces an extra layer of fruity tang and complexity.
How to Make Canning Apple Butter Recipe
Step 1: Prepare the Apple Butter
Start by placing your peeled, cored, and chopped apples into a large slow cooker, which is the perfect tool to slowly break down the fruit into a luscious spread. Add the granulated sugar, brown sugar, cinnamon, nutmeg, cloves, salt, and if you’re using it, the apple cider. Stir everything to combine, cover, and let it cook low and slow for 10 to 12 hours. This slow cooking draws out the natural sweetness and lets the spices meld beautifully while the apples soften and deepen in color to a rich, dark brown.
Step 2: Blend the Apple Mixture
Once your apples have cooked and transformed into that rich, aromatic mixture, use an immersion blender right in the slow cooker to puree the contents until smooth. If you find your apple butter is still a bit too thin after blending, keep cooking uncovered for another hour or two to thicken it up. Finally, stir in the vanilla extract, which adds that final touch of warmth and complexity that you’ll notice with every taste.
Step 3: Prepare for Canning
While the apple butter finishes thickening, prepare your jars and lids by sterilizing them in boiling water for 10 minutes. This step is crucial to make sure your jars are clean and safe for preserving. Keep the jars warm until you’re ready to fill them to prevent cracking when you add the hot apple butter.
Step 4: Fill and Process Jars
Carefully ladle the hot apple butter into each sterilized jar, leaving a ¼ inch of headspace to allow for expansion during processing. Wipe the rims clean with a damp cloth, then place the lids on and screw the rings on until they are fingertip-tight. This ensures a proper seal while avoiding over-tightening, which can interfere with the canning process.
Step 5: Process in a Water Bath
Submerge the filled jars in a boiling water bath, ensuring there is at least an inch of water covering the tops of the jars. Boil for 10 minutes to safely preserve the apple butter. If you live at a higher altitude, make sure to adjust the processing time accordingly for safe canning.
Step 6: Cool and Store
After processing, carefully remove the jars and set them on a towel or cooling rack to cool completely. Once cooled, check the seals by pressing the center of each lid—you shouldn’t feel any give. Store your sealed jars in a cool, dark place, where they’ll keep beautifully for up to a year, ready to bring joy whenever you need a little spreadable comfort.
How to Serve Canning Apple Butter Recipe
Garnishes
This apple butter shines even more when garnished thoughtfully. Try sprinkling a pinch of cinnamon or a few chopped toasted nuts on top when serving, adding just enough texture and extra aroma to elevate the experience without overpowering the natural apple flavors.
Side Dishes
Apple butter pairs wonderfully with a wide range of dishes. Spread it on warm biscuits or crusty bread for a quick indulgence, or serve alongside pork chops or roasted chicken to complement savory flavors with a sweet, spiced contrast. It’s also phenomenal paired with sharp cheddar cheese for an irresistible snack.
Creative Ways to Present
Why not mix things up and use this apple butter as a swirl in oatmeal or yogurt bowls for a naturally sweet twist? You can also brush it atop grilled flatbread as a base for a fall-inspired pizza, or even fold a spoonful into your morning pancake or waffle batter for an extra burst of flavor.
Make Ahead and Storage
Storing Leftovers
If you happen to have leftovers after opening a jar, transfer the apple butter to an airtight container and store it in the refrigerator for 3 to 4 days. This way, you can enjoy its fresh flavors without worrying about spoilage.
Freezing
If you want to keep your apple butter longer and in larger quantities, freezing is a great option. Simply scoop it into freezer-safe containers or bags, leaving some space for expansion, and freeze for up to 3 months. Thaw in the refrigerator when you’re ready to enjoy it again.
Reheating
To bring your apple butter back to a spreadable consistency, gently warm it in a saucepan over low heat or microwave it in short intervals, stirring in between. This will revive its silky texture without compromising the flavors.
FAQs
Can I use any type of apples for this recipe?
While you can experiment, using Fuji, Gala, or Honeycrisp apples is recommended because they offer a perfect balance of sweetness and firmness that breaks down beautifully during cooking.
What if my apple butter is too runny after cooking?
No worries! Just continue cooking it uncovered on low heat to reduce excess liquid. Stir frequently to prevent burning and keep an eye on the texture until it thickens up to your liking.
Why is the water bath canning step important?
The water bath ensures that your jars seal properly and that the apple butter is preserved safely by killing any bacteria or spores that could cause spoilage.
How long can I store sealed jars of apple butter?
Properly processed and stored in a cool, dark place, your sealed jars can last for up to one year, keeping all their fresh, spiced flavor intact.
Can I omit the apple cider in this recipe?
Absolutely! The apple cider is optional and simply adds a slight depth of flavor, but your apple butter will still be delicious without it.
Final Thoughts
There’s something truly magical about crafting your own apple butter, and this Canning Apple Butter Recipe makes it wonderfully accessible. From the very first slow-simmered batch to jarred delights waiting for chilly mornings, every spoonful carries a bit of cozy nostalgia and homemade love. I can’t wait for you to try it out, share it with your favorite people, and maybe even invent some delicious new ways to enjoy it!
Print
Canning Apple Butter Recipe
- Prep Time: 30 minutes
- Cook Time: 12 hours
- Total Time: 12 hours 30 minutes
- Yield: 4 half-pint jars (approximately 4 cups)
- Category: Canning
- Method: Slow Cooking
- Cuisine: American
- Diet: Gluten Free
Description
This homemade apple butter recipe transforms fresh apples into a rich, spiced, and smooth spread perfect for canning and long-term storage. Slow-cooked for hours, it combines the sweetness of granulated and brown sugars with warm spices like cinnamon, nutmeg, and cloves. Finished with a splash of vanilla and optionally enhanced with apple cider, this apple butter is ideal for spreading on toast, stirring into yogurt, or gifting during the holidays.
Ingredients
Apple Butter Ingredients
- 6 lbs apples (Fuji, Gala, or Honeycrisp), peeled, cored, and chopped
- 2 cups granulated sugar
- 1 cup brown sugar, packed
- 1 tablespoon ground cinnamon
- ½ teaspoon ground nutmeg
- ½ teaspoon ground cloves
- ¼ teaspoon salt
- 1 tablespoon vanilla extract
- ½ cup apple cider (optional for flavor depth)
Instructions
- Prepare the Apple Butter: Place the peeled, cored, and chopped apples into a large slow cooker. Add granulated sugar, brown sugar, cinnamon, nutmeg, cloves, salt, and apple cider if using. Stir thoroughly to combine all ingredients evenly.
- Cook the Apples: Cover the slow cooker and cook on low heat for 10 to 12 hours. Stir the mixture occasionally to prevent sticking and ensure even cooking. The apples should become very soft and dark brown in color.
- Blend the Apple Mixture: Use an immersion blender directly in the slow cooker to puree the apple mixture until smooth. If the apple butter appears too thin after blending, cook uncovered for an additional 1 to 2 hours to thicken further. Stir in the vanilla extract once desired consistency is achieved.
- Sterilize Jars and Lids: While the apple butter is finishing, sterilize canning jars and lids by boiling them in water for 10 minutes. Keep the jars warm until they are ready to be filled to prevent breakage and ensure food safety.
- Fill the Jars: Ladle the hot apple butter into the sterilized jars, leaving ¼ inch of headspace at the top. Clean the rims of the jars with a damp cloth to remove any residue, and seal with lids and screw bands, tightening until fingertip-tight.
- Process the Jars in a Water Bath: Place the filled jars into a boiling water bath, ensuring that the jars are submerged with at least 1 inch of water covering them. Boil the jars for 10 minutes to properly seal and preserve the apple butter. Adjust processing time for altitude if needed.
- Cool and Store: Carefully remove jars from the water bath and let them cool completely on a towel or rack without disturbing. Once cooled, check that each jar has sealed correctly (lids should not flex up and down). Store sealed jars in a cool, dark place for up to one year for best quality.
Notes
- The cooking time in the slow cooker can vary depending on apple variety and slow cooker model; ensure the mixture is thick and dark.
- Using apple cider is optional but adds extra depth and tang to the flavor.
- If you don’t have an immersion blender, you can transfer the apple mixture to a regular blender in batches, but be careful with hot liquids.
- Adjust processing time appropriately if you live above 1,000 feet altitude.
- Always use sterilized jars and proper canning techniques to avoid spoilage and ensure food safety.
- The apple butter thickens further as it cools, so don’t overcook to achieve thickness.
