
“`html
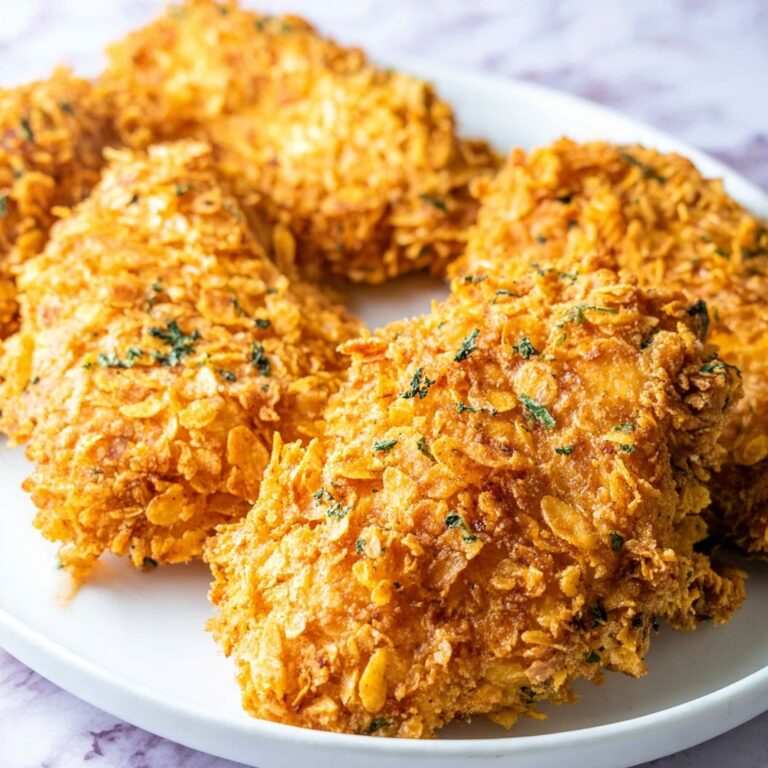
There is something undeniably comforting and downright delicious about a plate of crispy, golden chicken strips, and that’s exactly what you get with this Homemade Chicken Tenders Recipe. These tenderloins are coated in a perfectly seasoned, crunchy crust that locks in juicy, flavorful chicken with every bite. Whether you’re looking for a quick weeknight dinner or a crowd-pleasing snack, this recipe will soon become your go-to for feather-light, crispy chicken that’s bursting with flavor.
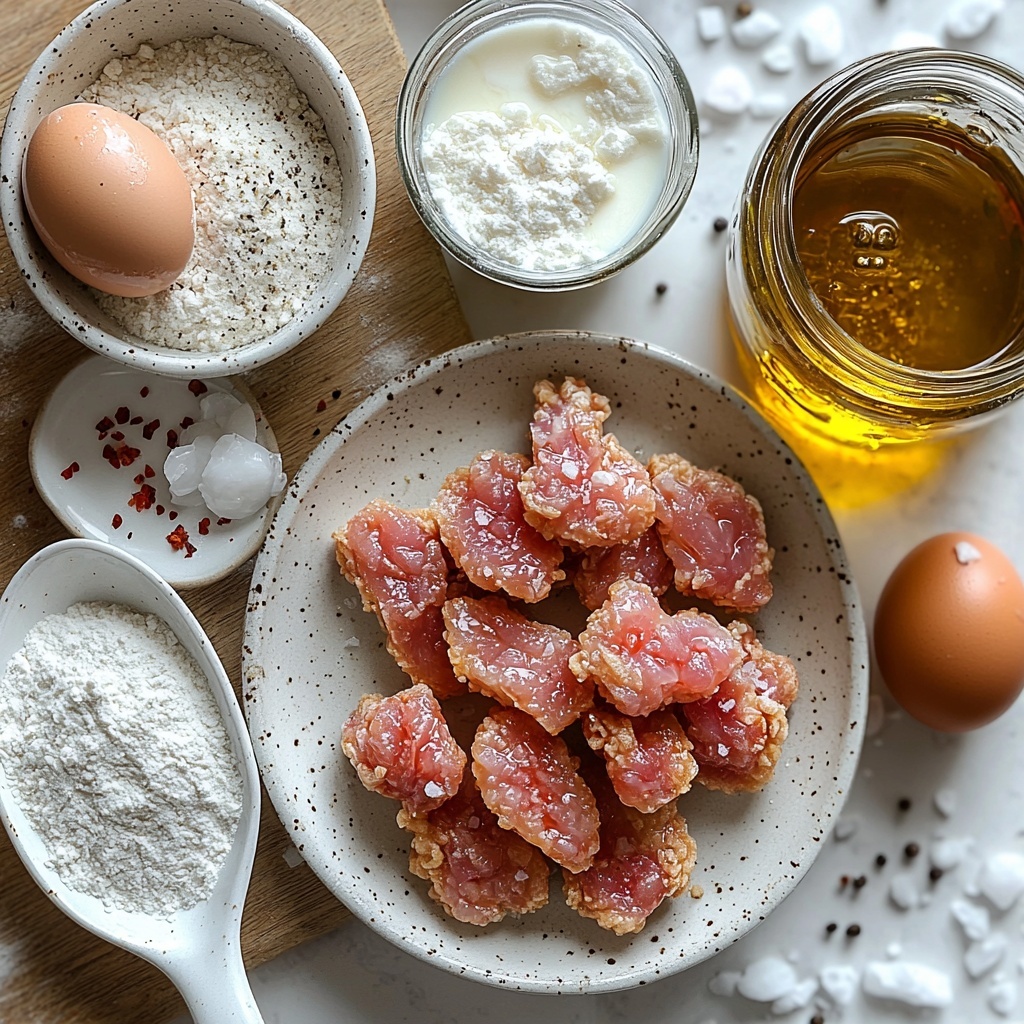
Ingredients You’ll Need
These ingredients are straightforward and easy to find, yet each plays a crucial role in the magic of this Homemade Chicken Tenders Recipe. From the tender chicken that forms the base to the flavorful spice blend, every item contributes to creating that perfect taste and irresistible texture.
- 1 lb chicken tenderloins: Tender and naturally juicy, these are perfect for quick frying and soaking up the coating.
- 1 cup all-purpose flour: The classic base for your breading, it helps create a crispy outer shell.
- 1 teaspoon baking powder: Adds lightness to the crust, making it extra crisp and airy.
- 1/2 teaspoon kosher salt: Enhances the natural flavor of the chicken and balances the seasoning.
- 1/2 teaspoon black pepper: Provides subtle heat and depth to the coating.
- 1/2 teaspoon garlic powder: Delivers a hint of savory warmth that complements the chicken perfectly.
- 3/4 cup buttermilk: Tenderizes the chicken and adds a slight tang to the coating.
- 1 large egg: Helps bind the buttermilk to the chicken and flour for that perfect crust adhesion.
- 2 teaspoons hot sauce: A gentle kick that livens up the buttermilk marinade without overpowering the dish.
- Oil for frying: Necessary for frying to golden perfection—choose a neutral oil with a high smoke point.
How to Make Homemade Chicken Tenders Recipe
Step 1: Prepare the Dry Coating
Begin by mixing the flour, baking powder, kosher salt, black pepper, and garlic powder in a bowl. This combination creates a seasoned, flavorful crust that crisps up beautifully during frying, balancing both texture and taste.
Step 2: Whisk the Wet Mixture
In a separate bowl, whisk together the buttermilk, egg, and hot sauce. This tangy and slightly spicy batter tenderizes the chicken and ensures the outer layer sticks perfectly to every piece.
Step 3: Heat the Oil
Pour about 3 inches of oil into a heavy skillet and heat it to 325°F. Perfect oil temperature guarantees that your chicken cooks quickly and evenly, resulting in a golden crust without greasiness.
Step 4: Dredge the Chicken
First, coat each chicken tender in the seasoned flour mix. Then dip it into the buttermilk mixture, and finally dredge again in the flour, pressing the coating firmly so it adheres well. This double-dredging technique is key for that extra crispy finish.
Step 5: Fry the Tenders
Fry the tenders in batches so the oil temperature stays consistent. Cook each side for 3 to 5 minutes until the crust is golden brown and the internal temperature reaches 165°F. This ensures juicy chicken encased in a perfectly crisp shell.
Step 6: Drain and Repeat
Once fried, place the tenders on a wire rack to drain excess oil and repeat the process with the remaining pieces. This keeps the crust crisp rather than soggy, maintaining that ideal texture you crave.
How to Serve Homemade Chicken Tenders Recipe
Garnishes
Adding fresh garnishes can elevate your Homemade Chicken Tenders Recipe to the next level. Sprinkle some chopped parsley or chives on top for a pop of color and freshness, or offer lemon wedges to add a zesty brightness that balances the richness.
Side Dishes
These tenders pair wonderfully with a variety of sides. Think classic crispy fries or a light coleslaw for crunch. For something healthier, try roasted vegetables or a fresh green salad. They also make fabulous companions to creamy mashed potatoes or buttery corn on the cob.
Creative Ways to Present
Serving your homemade chicken tenders on a wooden board with small dipping sauce bowls—ranch, honey mustard, or spicy aioli—makes for a fun, shareable experience. You can also turn them into sliders by placing a tender inside a mini bun with lettuce and pickles, perfect for parties or casual gatherings.
Make Ahead and Storage
Storing Leftovers
Once cooled, store your leftover homemade chicken tenders in an airtight container in the refrigerator. They will keep well for 3 to 4 days, retaining their flavor and texture with a quick reheat.
Freezing
You can freeze cooked tenders by laying them out in a single layer on a baking sheet to freeze individually before transferring to a freezer-safe bag or container. They’ll stay fresh for up to 1 month. Just thaw overnight in the fridge before reheating.
Reheating
To bring back the crispiness, reheat tenders in a 375°F oven on a wire rack for about 10 minutes. Avoid the microwave if you want to keep that crunch intact. This method ensures they are hot inside and remain delightfully crispy outside.
FAQs
Can I use chicken breasts instead of tenderloins?
Absolutely! You can slice chicken breasts into strips similar in size to tenderloins, but keep in mind that tenders tend to cook more evenly and stay juicier due to their natural tenderness.
Is buttermilk essential in this recipe?
Buttermilk is highly recommended as it tenderizes the chicken and adds a mild tang that enhances flavor. If unavailable, you can substitute with milk mixed with a tablespoon of lemon juice or vinegar.
Can I bake these instead of frying?
While frying is key to the classic crispy texture, you can bake them at 400°F for about 20 minutes, flipping halfway. The crust won’t be quite as crunchy, but it’s a healthier alternative that still tastes great.
What oil is best for frying chicken tenders?
Neutral oils with high smoke points like vegetable, canola, or peanut oil are best. They fry the chicken perfectly without imparting unwanted flavors.
How can I make the coating extra crispy?
Double dredging with flour and pressing the coating firmly helps create that irresistible crunch. Also, frying in batches prevents overcrowding the pan, which keeps the oil temperature steady and the crust crisp.
Final Thoughts
There’s nothing quite like the joy of homemade comfort food, and this Homemade Chicken Tenders Recipe is a shining example. It’s simple, satisfying, and packs that perfect crispy crunch with juicy, tender chicken inside. I can’t wait for you to make it, enjoy it, and share it with all your favorite people.
“`
Print
Homemade Chicken Tenders Recipe
- Prep Time: 7 minutes
- Cook Time: 11 minutes
- Total Time: 18 minutes
- Yield: 4 servings
- Category: Main Dish
- Method: Frying
- Cuisine: American
Description
Crispy and flavorful homemade chicken tenders made with a seasoned flour coating and a buttermilk marinade, fried to golden perfection for a juicy and tender bite every time.
Ingredients
Chicken
- 1 lb chicken tenderloins
Dry Ingredients
- 1 cup all purpose flour
- 1 teaspoon baking powder
- 1/2 teaspoon kosher salt
- 1/2 teaspoon black pepper
- 1/2 teaspoon garlic powder
Wet Ingredients
- 3/4 cup buttermilk
- 1 large egg
- 2 teaspoons hot sauce
Other
- Oil for frying (enough to fill 3 inches of a heavy skillet)
Instructions
- Prepare Dry Mix: In a bowl, combine the all-purpose flour, baking powder, kosher salt, black pepper, and garlic powder. Mix well to evenly distribute the seasonings.
- Prepare Wet Mix: In a separate bowl, whisk together the buttermilk, egg, and hot sauce until smooth and fully combined.
- Heat Oil: Pour enough oil into a heavy skillet to fill about 3 inches and heat it to 325°F (163°C) for frying. Use a thermometer for accurate temperature.
- Coat Chicken: Dredge each chicken tenderloin first in the dry flour mixture, then dip it into the wet buttermilk mixture, and finally dredge it again in the dry flour mix, pressing firmly to ensure a thick coating.
- Fry Chicken: Working in batches, carefully place the coated chicken tenders in the hot oil and fry for 3 to 5 minutes per side. Cook until the coating is golden brown and the internal temperature of the chicken reaches 165°F (74°C).
- Drain and Serve: Transfer the fried chicken tenders to a wire rack to drain excess oil. Repeat the frying process with remaining tenders. Serve hot and enjoy.
Notes
- Maintain oil temperature at 325°F to ensure even cooking and avoid greasy chicken tenders.
- Press the flour coating firmly onto chicken for extra crispy texture.
- Using a wire rack for draining prevents sogginess compared to paper towels.
- Adjust hot sauce quantity in the wet mix according to your preferred spice level.
- Make sure chicken tenderloins are all about the same size for even cooking.

