There is something truly magical about homemade bread, especially when it’s as comforting and approachable as this Easy Sandwich Bread Recipe for Beginners Recipe. It strikes the perfect balance of soft, fluffy texture and a golden crust that makes every sandwich unbelievably satisfying. Whether you’re a novice baker or just looking for a dependable recipe to impress your loved ones, this bread is a wonderfully simple, reliable companion in any kitchen. Plus, watching dough transform right before your eyes is one of the most rewarding culinary experiences you can have!
Ingredients You’ll Need
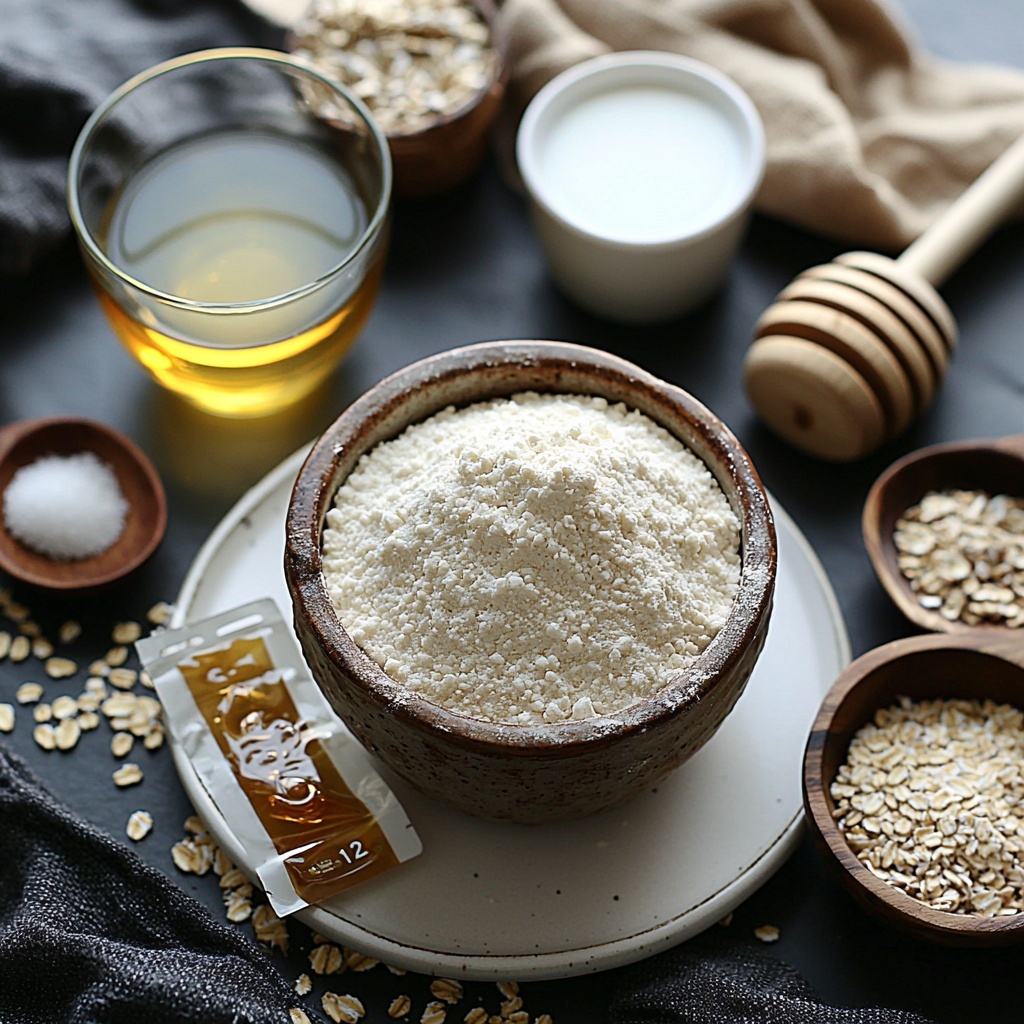
Gathering a handful of simple ingredients is all it takes to create this delicious loaf. Each one plays a vital role, contributing to the bread’s tender crumb, inviting aroma, and beautiful crust.
- All-purpose or bread flour: The foundation of your bread, providing structure and chew.
- Warm water (105–115°F): Activates the yeast and helps develop the dough’s softness.
- Milk (dairy or non-dairy): Adds richness and moisture for a tender crumb.
- Active dry or instant yeast: The leavening magic that makes your bread rise and become airy.
- Sugar or honey: A touch of sweetness that also fuels the yeast for a better rise.
- Neutral oil or melted butter: Keeps the bread moist and gives a smooth texture.
- Salt: Balances flavor and strengthens the gluten for better chew.
- Optional add-ins: Butter for brushing and toppings like seeds or oats to dress the loaf beautifully.
How to Make Easy Sandwich Bread Recipe for Beginners Recipe
Step 1: Proof the Yeast
Start by waking up your yeast if you’re using active dry—to do this, mix warm water with sugar, sprinkle yeast on top, and wait for it to foam up. That foam means your yeast is alive and ready to work its magic. If you’re using instant yeast, feel free to skip this step and mix it directly with the flour.
Step 2: Add Liquids and Salt
Next, stir in your milk, oil or melted butter, and salt. Make sure everything is warm but not hot; this ensures your yeast stays happy. These liquids will blend to create a soft, pliable dough that bakes into bread with a tender crumb.
Step 3: Mix in the Flour
Add 2 1/2 cups of flour initially and stir until you have a shaggy dough. Gradually add more flour, a little at a time, until the dough pulls away from the bowl but remains slightly tacky. This balance is key—too much flour and you’ll end up with a dense loaf.
Step 4: Knead
Turn your dough onto a lightly floured surface and knead by hand for 7 to 9 minutes, or use a mixer to cut that time to about 5 or 6 minutes. You’ll know you’re done when the dough is smooth, elastic, and springs back when lightly pressed—a sure sign your gluten has developed well.
Step 5: First Rise
Place your dough in a lightly oiled bowl and turn it once so it’s coated in oil. Cover with a towel or plastic wrap and set it somewhere warm to rise until it doubles in size. This usually takes between 60 and 90 minutes, depending on your room temperature.
Step 6: Shape the Loaf
After the rise, gently deflate the dough and press it into a rectangle roughly the length of your loaf pan. Roll it up tightly from the short side, pinch the seam closed, and tuck in the ends. Place the rolled dough seam-side down in a greased loaf pan to prepare for the second rise.
Step 7: Second Rise
Cover the loaf again and allow it to rise until it crowns about an inch above the pan’s rim. This usually takes 30 to 45 minutes. Use this time wisely to preheat your oven to 350°F (175°C). Watching that dough puff up is a moment full of anticipation!
Step 8: Bake
Bake your bread for 28 to 35 minutes, or until the top turns a deep golden brown and the loaf sounds hollow when tapped. If you have a food thermometer, an internal temperature between 190 and 195°F is a perfect indicator that your bread is done.
Step 9: Finish and Cool
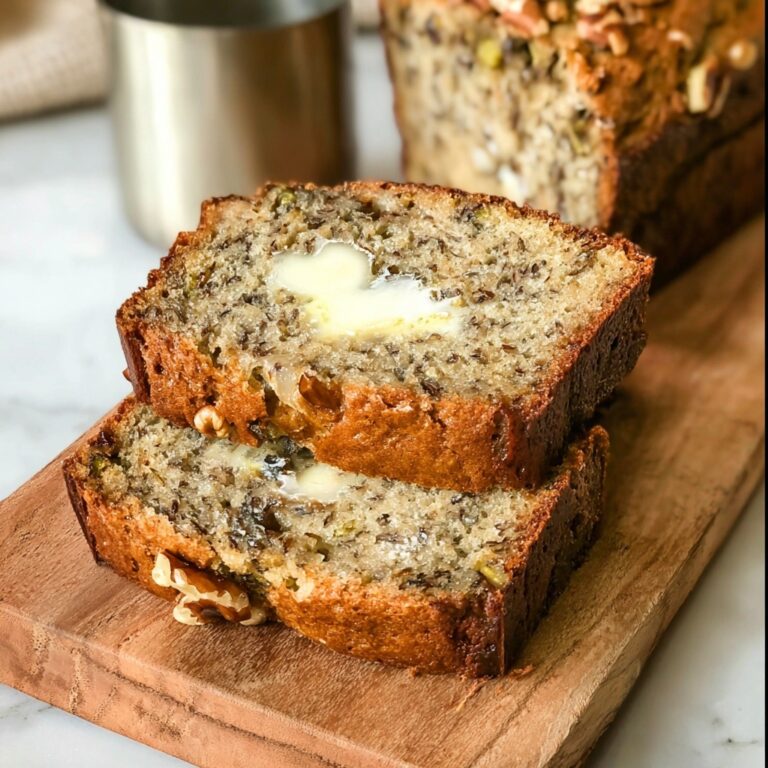
Once baked, remove the bread from the pan immediately to keep the crust from becoming soggy. If you want a soft, buttery crust, brush the top with melted butter while it’s still warm. Let your bread cool completely on a wire rack for at least an hour before slicing—you’ll be rewarded with clean slices and a perfect crumb.
How to Serve Easy Sandwich Bread Recipe for Beginners Recipe
Garnishes
A simple brush of melted butter is fantastic, but you can also sprinkle seeds or oats on the dough before baking for extra texture and a rustic appearance that impresses every time. Freshly ground black pepper, or even a pinch of flaky sea salt, can be added when serving for that little flavor boost.
Side Dishes
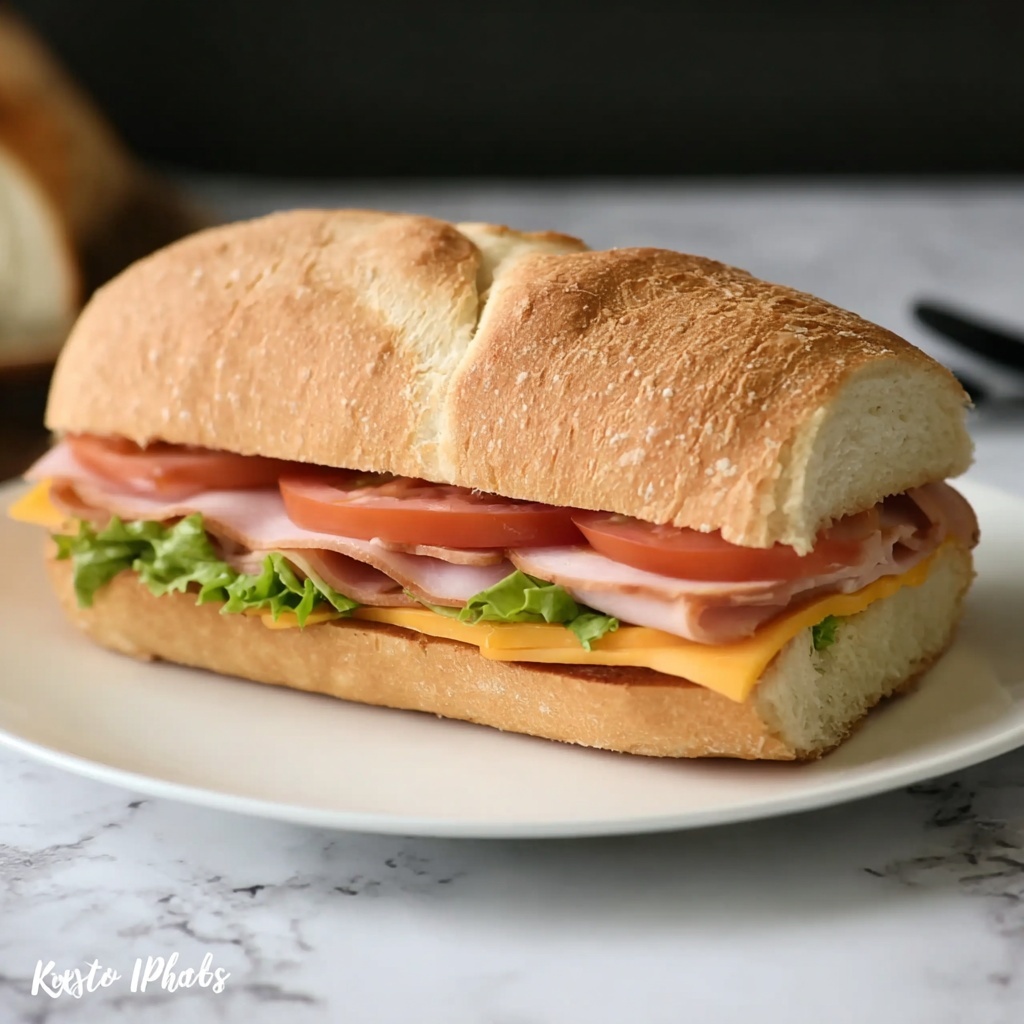
This bread is a perfect partner to almost anything. Whip up a creamy tomato soup, layer it with fresh veggies and deli meats for sandwiches, or use it to soak up rich stews. Its soft crumb and neutral flavor make it versatile enough to complement both savory and sweet dishes.
Creative Ways to Present
Turn this straightforward loaf into a star centerpiece by slicing it thick and using it for open-faced sandwiches, bruschettas, or even French toast. Toasted slices drizzled with honey and topped with fresh fruit are a simple yet elegant way to show off your homemade bread.
Make Ahead and Storage
Storing Leftovers
If you don’t finish your loaf in one go, store it in a bread box or a loosely tied plastic bag at room temperature. This keeps the bread soft and prevents it from drying out for up to three days.
Freezing
Easy Sandwich Bread Recipe for Beginners Recipe freezes beautifully. Slice the loaf first and wrap individual pieces or the whole loaf tightly in plastic wrap followed by aluminum foil. Thaw slices at room temperature or toast directly from frozen for convenience.
Reheating
Reheat your bread by popping slices into the toaster or warming the entire loaf in an oven preheated to 300°F for 10 to 15 minutes. Brushing with a little butter before warming can bring back that fresh-baked aroma and taste.
FAQs
Can I use whole wheat flour instead of all-purpose flour?
Yes, you can substitute whole wheat flour for some or all of the all-purpose flour, but keep in mind it will make the bread denser and alter the flavor slightly. Consider starting with half whole wheat flour to maintain a tender texture.
What if my bread doesn’t rise well?
Make sure your yeast is fresh and your liquids are warm enough (not hot). Additionally, rising times can vary with temperature—if it’s too cold, the dough may take longer. Providing a warm, draft-free spot is key to a good rise.
Can I make this bread without kneading?
This recipe relies on kneading to develop gluten and texture, but with longer fermentation, you could try a no-knead method. However, the texture and rise might not be as reliable for beginners following this recipe.
Is it necessary to brush the bread with butter after baking?
Brushing with butter is optional but highly recommended if you prefer a softer crust with a lovely shine and added flavor. If you like a crispier crust, you can skip this step.
How thick should I slice the bread?
Slices about 1/2 to 3/4 inch thick work best for sandwiches and toast. Thicker slices are great for open-faced sandwiches or dipping into soups, while thinner slices toast quickly and crisply.
Final Thoughts
Trying out the Easy Sandwich Bread Recipe for Beginners Recipe is like opening the door to endless homemade sandwich deliciousness. It’s approachable, forgiving, and yields a loaf that feels kitchen-baked with love and care. So gather your ingredients, roll up your sleeves, and savor the joy of baking bread that truly brings everyone to the table with a smile!
Print
Easy Sandwich Bread Recipe for Beginners Recipe
- Prep Time: 30 minutes
- Cook Time: 35 minutes
- Total Time: 2 hours 50 minutes
- Yield: 12 servings (1 loaf)
- Category: Bread
- Method: Baking
- Cuisine: American
Description
This easy sandwich bread recipe is perfect for beginners, offering a soft, reliable, and simple loaf that’s ideal for sandwiches. Made with basic ingredients like all-purpose flour, yeast, and milk, this bread yields a tender crumb and a lightly golden crust, perfect for any sandwich or toast.
Ingredients
Main Ingredients
- All-purpose flour (or bread flour): about 3 to 3 1/2 cups
- Warm water (105–115°F): 1 cup
- Milk (any kind, even non-dairy): 1/2 cup
- Active dry yeast or instant yeast: 2 1/4 teaspoons (one packet)
- Sugar or honey: 2 tablespoons
- Neutral oil or melted butter: 2 tablespoons
- Salt: 1 1/4 teaspoons
Optional Add-Ins
- 1 tablespoon butter for brushing
- Seeds (sesame, poppy, sunflower)
- Oats for topping
Instructions
- Proof the yeast: In a large bowl, mix warm water and sugar. Sprinkle the yeast on top and wait 5–10 minutes until foamy. If using instant yeast, skip this step and add it later with the flour.
- Add liquids and salt: Stir in the milk, oil or melted butter, and salt. Make sure the liquid is warm but not hot.
- Mix in the flour: Add 2 1/2 cups of flour and stir until a shaggy dough forms. Gradually add more flour little by little, until the dough pulls away from the bowl and feels slightly tacky, but not sticky.
- Knead the dough: Turn the dough onto a lightly floured surface and knead for 7–9 minutes by hand, or 5–6 minutes using a mixer, until smooth and elastic. The dough should spring back when gently pressed.
- First rise: Place the dough in a lightly oiled bowl, turning once to coat. Cover with a towel or plastic wrap and let it rise in a warm spot until doubled in size, about 60–90 minutes.
- Shape the loaf: Gently deflate the dough and press it into a rectangle about the length of your loaf pan. Roll it tightly from the short side, pinch the seam, and tuck in the ends. Place seam-side down in a greased 8.5×4.5-inch or 9×5-inch loaf pan.
- Second rise: Cover the pan and let the dough rise until it crowns about 1 inch above the rim, about 30–45 minutes. Preheat the oven to 350°F (175°C) during this time.
- Bake the bread: Bake for 28–35 minutes until the top is deep golden and the loaf sounds hollow when tapped. The internal temperature should reach 190–195°F.
- Finish and cool: Remove the bread from the pan immediately to prevent the crust from becoming soggy. Brush the top with butter if you prefer a soft crust. Cool on a wire rack for at least 1 hour before slicing.
Notes
- Use a kitchen thermometer to check the water temperature for yeast proofing; it should be warm but not hot to avoid killing the yeast.
- Substitute bread flour for all-purpose flour for a chewier texture and better rise.
- If you want a crustier loaf, skip brushing the top with butter after baking.
- Optional toppings like seeds or oats can be added after the second rise by lightly brushing the dough with water before sprinkling.
- Store sliced bread in an airtight container or plastic bag at room temperature for up to 3 days, or freeze for longer storage.


